Flying Star Flyer to Japan? Get Online Instantly on Arrival | Yoho
Flying to Japan on Star Flyer is an exciting start to your adventure. Known for its premium service and sleek black aircraft, it promises a comfortable journey. But the real challenge for many first-time visitors begins after the plane touches down: navigating a new country. That’s why having internet access the moment you land is no longer a luxury—it’s essential. This guide will walk you through the Star Flyer arrival process and show you the easiest way to get online instantly, so you can skip the stress and start exploring right away.
Imagine stepping off the plane and immediately being able to look up your train route, message your family, or translate a confusing sign. Instead of hunting for spotty airport Wi-Fi or waiting in long lines for a physical SIM card, you can be connected and confident. With a travel eSIM, this seamless experience is entirely possible. Let’s make your arrival in Japan as smooth as your flight.
Your Star Flyer Arrival: What to Expect
Whether you’re landing at Narita (NRT), Haneda (HND), or one of Star Flyer’s other destinations like Kitakyushu (KKJ), the arrival process is efficient but can feel overwhelming for newcomers. After deplaning, you’ll proceed through several key steps:
- Quarantine & Immigration: Follow the signs to the immigration hall. Have your passport and arrival card ready. The process is typically straightforward, but queues can form during peak hours.
- Baggage Claim: Check the monitors for your flight number to find the correct baggage carousel.
- Customs Declaration: Collect your luggage and proceed to the customs checkpoint. You’ll need to hand over the customs declaration form you filled out on the plane.
Once you’re through customs, you’ll enter the arrivals hall. This is where the real journey begins, and where instant internet access becomes your most valuable tool.
The Connectivity Challenge: Why Instant Internet is Non-Negotiable
In the past, travelers relied on airport Wi-Fi or rushed to vendor kiosks. However, these traditional methods come with significant downsides. Airport Wi-Fi can be slow and unsecured, while buying a local SIM card or renting a pocket Wi-Fi device often involves long queues, paperwork, and language barriers—exactly what you don’t need after a long flight.
Here’s why getting online instantly is crucial:
- Navigation: Use Google Maps or Apple Maps to find your hotel or first destination without confusion.
- Translation: Communicate effectively with apps like Google Translate.
- Transportation: Check train schedules, buy tickets, or book a ride-share service.
- Communication: Let loved ones know you’ve arrived safely.
The Smart Solution: Get Online Before You Land with an eSIM
An eSIM (embedded SIM) is a digital SIM card that allows you to activate a cellular plan without needing a physical nano-SIM. For travelers, it’s a game-changer. With Yoho Mobile, you can purchase and set up your Japan data plan from the comfort of your home, ensuring you’re ready to connect the second you land.
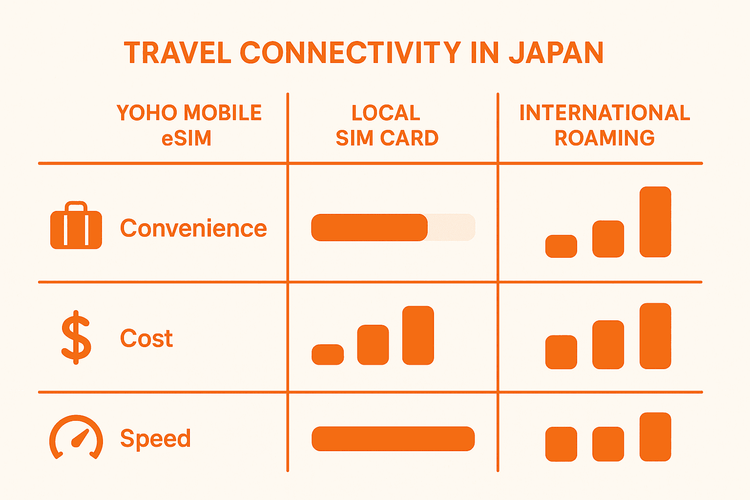
Why choose a Yoho Mobile eSIM for your Japan trip?
- Ultimate Convenience: Install your eSIM before you even leave for the airport. There are no cards to swap and nothing to pick up on arrival.
- Flexible Plans: Don’t pay for data you don’t need. Yoho Mobile allows you to choose the perfect amount of data and duration for your trip. Whether you’re in Tokyo for a weekend or exploring the country for a month, there’s a plan for you. Build your perfect Japan eSIM plan now.
- Avoid High Roaming Fees: An eSIM is a cost-effective alternative to the exorbitant charges your home carrier will bill you for international roaming.
- Peace of Mind: With our Yoho Care service, you’re protected from being completely cut off, even if you happen to use up your high-speed data allowance.
Step-by-Step: Activating Your Yoho Mobile Japan eSIM
Getting set up with Yoho Mobile is incredibly simple. Follow these steps to ensure you’re connected the moment you arrive in Japan.
Step 1: Check if Your Phone is eSIM-Compatible
Most modern smartphones support eSIM technology, but it’s always best to confirm. You can check our comprehensive eSIM compatible device list to be sure.
Step 2: Choose and Purchase Your Plan
Head over to the Yoho Mobile website and select a data plan for Japan. Complete your purchase, and you’ll receive an email with installation instructions.
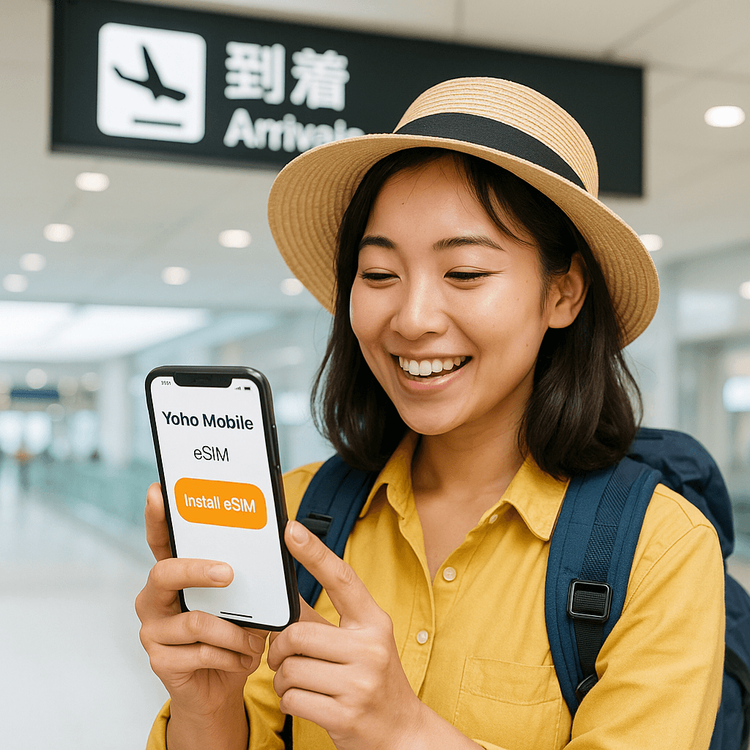
Step 3: Install Your eSIM (Before You Fly!)
This is the magic step. The process is slightly different for iOS and Android users:
- For iOS users: It’s incredibly easy. After purchase, simply tap the ‘Install’ button in the Yoho Mobile app or from your confirmation email. Your iPhone will automatically guide you through the 1-minute setup—no QR codes to scan or codes to enter!
- For Android users: You will receive a QR code. Just go to your phone’s network settings, select ‘Add eSIM’, and scan the code. Follow the on-screen prompts to complete the installation.
Step 4: Land, Connect, and Explore
Once your Star Flyer flight has landed and you’re allowed to use electronic devices, simply turn on your phone. Go to your cellular settings, switch your data line to the Yoho Mobile eSIM, and ensure ‘Data Roaming’ is enabled for the eSIM. You’ll connect to a local Japanese network within moments.
Frequently Asked Questions (FAQ)
Can I use an eSIM on a Star Flyer flight?
You cannot use the eSIM’s cellular data during the flight. However, you should install it on your phone before you depart. This way, it is ready for immediate activation as soon as you land in Japan and switch off airplane mode.
What is the easiest way for tourists to get online in Japan?
An eSIM is widely considered the easiest and most convenient option. It allows you to get online instantly upon arrival without the need to find a store, wait in line, or deal with physical SIM cards. Yoho Mobile’s flexible plans make it perfect for any trip length.
Will my phone work in Japan?
Most modern smartphones will work perfectly in Japan. The key is to ensure your phone is ‘unlocked’ (not tied to a single carrier) and supports eSIM technology. You can verify this by checking our compatibility list or contacting your home provider.
How do I avoid expensive roaming charges when traveling to Japan?
The best way to avoid high roaming fees is to turn off data roaming for your primary SIM card before you land and use a travel eSIM for all your data needs. A prepaid data eSIM from Yoho Mobile gives you a fixed cost, so there are no surprise bills when you get home.
Conclusion: Start Your Japan Adventure the Smart Way
A trip to Japan is an unforgettable experience, and your arrival should be exciting, not stressful. By flying with a great airline like Star Flyer and preparing your connectivity in advance with a Yoho Mobile eSIM, you set yourself up for a seamless start. Forget the airport queues and data anxieties. Step off the plane, connect instantly, and immerse yourself in the wonders of Japan from the very first moment.
Ready for a worry-free arrival? Explore our Japan eSIM plans today and travel with the confidence that you’re always connected. You can even try our service with a free trial eSIM to see how easy it is!