eSIM vs Local SIM at Narita (NRT) 2025: Don't Wait in Line
You’ve just survived a long-haul flight. You navigate the maze of Narita International Airport (NRT), clear immigration, grab your bags, and step into the arrivals hall. What’s the first thing you need? Internet. The modern traveler’s lifeline for navigating subways, translating menus, and posting that “I’ve arrived!” selfie.
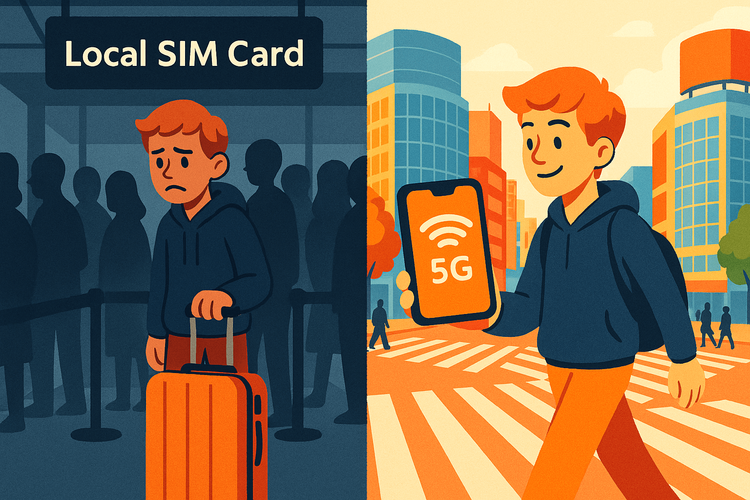
For years, the go-to move was to find a kiosk and queue up for a local Japanese SIM card. But in 2025, there’s a smarter, faster way. This is the ultimate showdown: the tedious wait for a physical SIM card at Narita versus the instant connectivity of a travel eSIM installed before you even leave home. If you’re unsure about the tech, why not test it out? You can even get a free eSIM trial from Yoho Mobile to see how seamless it is.
The Traditional Route: Buying a SIM Card at Narita Airport
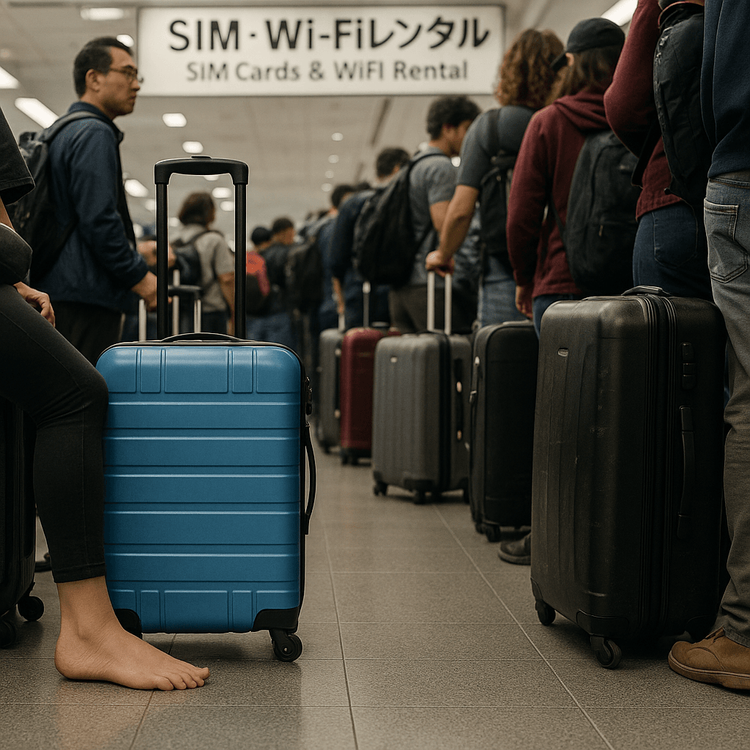
Walk into the arrivals hall at NRT, and you’ll see them: brightly lit counters for Docomo, SoftBank, and various resellers, all promising the best SIM card for your Japan adventure. The reality, however, often involves a queue. After a 10+ hour flight, the last thing anyone wants is to stand in another line.
The Process:
- Find the Kiosk: Locate the correct counter for your needs (data-only, voice + data, etc.).
- Wait… and Wait: This is the biggest drawback. The waiting time for a SIM card at Narita airport can range from 20 minutes to over an hour, especially when multiple international flights land at once.
- The Transaction: You’ll need to present your passport, choose a plan that might not be perfectly tailored to your trip duration, and pay—often in cash or with a card that hopefully doesn’t get flagged for a foreign transaction.
While on-site staff can help with setup, the time lost is a significant price to pay. This is precious vacation time you could be spending on the Narita Express, heading into the heart of Tokyo.
The Modern Alternative: Activating a Yoho Mobile eSIM Before You Fly
Imagine this instead: your plane’s wheels touch down at Narita. You switch your phone off airplane mode, and boom—you’re instantly connected to a local Japanese network. No queues, no passport fumbling, no hassle. This is the power of an eSIM (embedded SIM).
An eSIM is a digital SIM that allows you to activate a cellular plan without needing a physical nano-SIM. You can purchase and set it up from the comfort of your home. For travelers, this is a revolutionary convenience.
How to activate an eSIM for Japan before travel:
- Choose Your Plan: Select a data package that fits your trip length and needs. With Yoho Mobile’s flexible plans, you only pay for the data and duration you require. Explore Japan Travel eSIM Plans here.
- Install: For iOS users, the process is incredibly simple. After purchase, you just tap ‘Install’ in the Yoho Mobile app, and you’re guided through a 1-minute setup—no QR codes or manual activation codes needed. Android users follow a quick QR code scan.
- Land and Connect: Upon arrival in Japan, simply switch to your Yoho Mobile eSIM in your phone’s settings, and you’re online immediately.
It’s that easy. Before you start, it’s always a good idea to check if your device is eSIM-compatible.
Head-to-Head Comparison: eSIM vs. Narita Local SIM
Let’s break down the key differences to help you decide which is the best internet option for first-time visitors to Japan.

| Feature | Yoho Mobile eSIM | Local SIM at Narita Airport |
|---|---|---|
| Convenience | ⭐⭐⭐⭐⭐ (Activate at home, instant connection on arrival) | ⭐⭐ (Long queues, requires passport and payment on site) |
| Activation Speed | ⭐⭐⭐⭐⭐ (1-2 minutes) | ⭐⭐ (20-60+ minutes including wait time) |
| Cost | ⭐⭐⭐⭐ (Competitive, transparent pricing. No hidden fees) | ⭐⭐⭐ (Can be expensive, especially for short trips) |
| Flexibility | ⭐⭐⭐⭐⭐ (Easily top up or change plans via the app) | ⭐⭐ (Fixed plans, topping up can be difficult) |
| Reliability | ⭐⭐⭐⭐⭐ (Uses top-tier local Japanese networks) | ⭐⭐⭐⭐ (Generally reliable once activated) |
One of the biggest advantages of an eSIM is peace of mind. If you underestimate your data usage while exploring Kyoto’s temples, you can simply add more data through the app. Better yet, with Yoho Care, you’re protected from being completely cut off even if your plan runs out. Learn more about how Yoho Care keeps you connected.
What Real Travelers on Reddit Say
A quick search on travel forums like Reddit reveals a clear trend. Travelers in 2024 and 2025 are overwhelmingly recommending eSIMs for Japan. Common complaints about buying a SIM at Narita include “the line at the Docomo counter was insane” and “wasted the first hour of my trip waiting for data.”
In contrast, comments on eSIMs are glowing:
“Landed at Narita, turned on my eSIM line, and had service before I even got to baggage claim. Total game-changer.”
“Don’t bother with the airport SIMs. Get an eSIM beforehand. It’s cheaper and a million times more convenient, especially after a long flight.”
The consensus is clear: for a stress-free start to your Japanese vacation, an eSIM is the superior choice.
Frequently Asked Questions (FAQ)
Can I buy a local SIM card at Narita Airport 24/7?
While the airport is open 24/7, most SIM card kiosks have limited operating hours, typically from around 7:00 AM to 9:00 PM. If you have a late-night or early-morning arrival, you might find them closed, leaving you without connectivity. An eSIM works regardless of your arrival time.
Is an eSIM more expensive than a local SIM for Japan?
Not necessarily. The cost of a local SIM card at Narita Airport often includes a premium for convenience. eSIM plans, like those from Yoho Mobile, are highly competitive and offer better flexibility. You can buy a small data package for a short trip without overpaying for a 30-day physical SIM.
How do I activate a Yoho Mobile eSIM for Japan on my iPhone?
The Yoho Mobile Japan eSIM activation process is designed for simplicity. For iPhone users, after purchasing your plan in our app, you’ll see an ‘Install’ button. Tapping it will automatically open your iPhone’s settings and guide you through the final steps in under a minute. No need to scan a QR code.
What happens if I run out of data on my Yoho Mobile eSIM in Japan?
You have two great options. You can easily purchase a new data plan (top-up) directly from the Yoho Mobile app at any time. Furthermore, our exclusive Yoho Care service provides a safety net, ensuring you maintain a basic level of connectivity for essential services like maps and messaging even after your high-speed data is used up.
Conclusion: Your Trip Starts at Landing, Not in a Line
Your journey to Japan should be about creating amazing memories, not starting with the frustration of a long queue. While buying a local SIM card at Narita Airport was once the standard, eSIM technology has made it an outdated and inefficient choice for the modern traveler.
By choosing a Yoho Mobile eSIM, you gain immediate connectivity, total convenience, and the flexibility to manage your data plan on the go. You can step off the plane with the confidence that your digital lifeline is already active, ready to help you navigate, explore, and share your incredible Japanese adventure from the very first moment.
Ready for a seamless travel experience? Get your Japan eSIM today and land connected!