eSIM QR Code Not Working? How to Manually Install Your eSIM
Picture this: you’ve just landed in a new country, excited to start your adventure. You pull up your new eSIM email, ready to get connected, but the QR code just won’t scan. Your phone’s camera can’t focus, the code is blurry, or it simply returns an error. It’s a frustrating moment that can feel like a major travel hiccup.
But don’t panic! A non-working QR code is a common issue, and there’s a simple, reliable backup plan: manual installation. This guide will walk you through exactly how to activate your eSIM by entering the details by hand, ensuring you get online no matter what.
At Yoho Mobile, we believe travel should be seamless. While we’ve made our installation process incredibly simple, especially for iOS users, knowing how to handle these little bumps in the road is key to stress-free travel. Ready to become an eSIM pro? Let’s dive in. For a connection you can always count on, explore Yoho Mobile’s flexible eSIM plans for your next destination.
Common Reasons Your eSIM QR Code Won’t Scan
Before jumping to the solution, it helps to understand the problem. If you’re wondering, “Why can’t I scan my QR code?” it’s often due to one of these factors:
- Poor Camera Quality or Focus: An older phone camera might struggle to focus on the fine details of the QR code.
- Damaged or Low-Quality Code: The code itself might be blurry, distorted, or incomplete in the email you received.
- Screen Glare or Brightness: Trying to scan a code from another device’s screen can be difficult due to glare, reflections, or incorrect brightness levels.
- Expired or Invalid Code: Some QR codes are single-use or have an expiration window. If it’s been a while since you purchased, the code might no longer be valid.
- Connectivity Issues: Your device needs a stable internet connection (like Wi-Fi) to fetch the eSIM profile after scanning the code. A poor connection can cause the process to fail.
Before You Begin: A Quick Checklist
To install your eSIM manually, you only need three things. Have these ready before you start:
- A Stable Internet Connection: You must be connected to Wi-Fi to download and activate the eSIM profile.
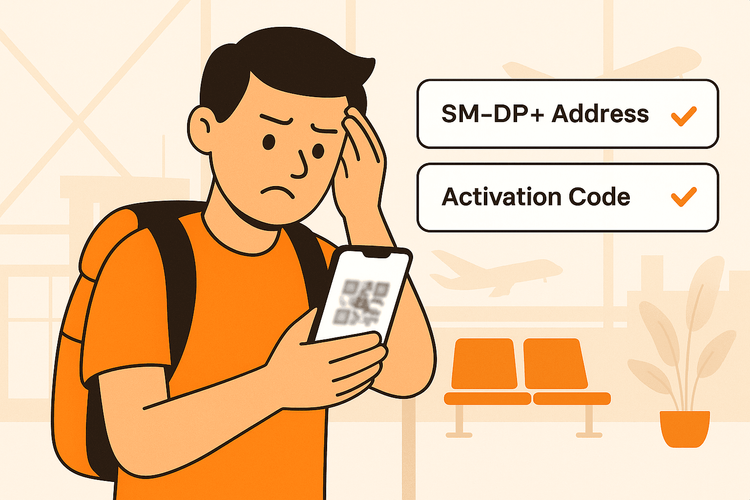
- Your Manual Installation Details: These will be in the same email or app where you found your QR code. You are looking for:
- SM-DP+ Address: A server address that your phone needs to contact.
- Activation Code: A unique string of letters and numbers for your specific eSIM profile.
- An eSIM-Compatible Device: Manual installation only works if your phone supports eSIM technology. Not sure about yours? Check if your device is on our eSIM compatible list.
How to Manually Install Your eSIM: A Step-by-Step Guide
With your details in hand, the process is straightforward. The steps vary slightly between iOS and Android.
For iOS Devices (iPhone/iPad)
For Yoho Mobile customers using an iPhone, it’s even easier! After purchasing your eSIM, simply tap the “Install” button in your confirmation email or Yoho Mobile account. This will take you directly into the iOS installation flow—no QR code or manual entry needed!
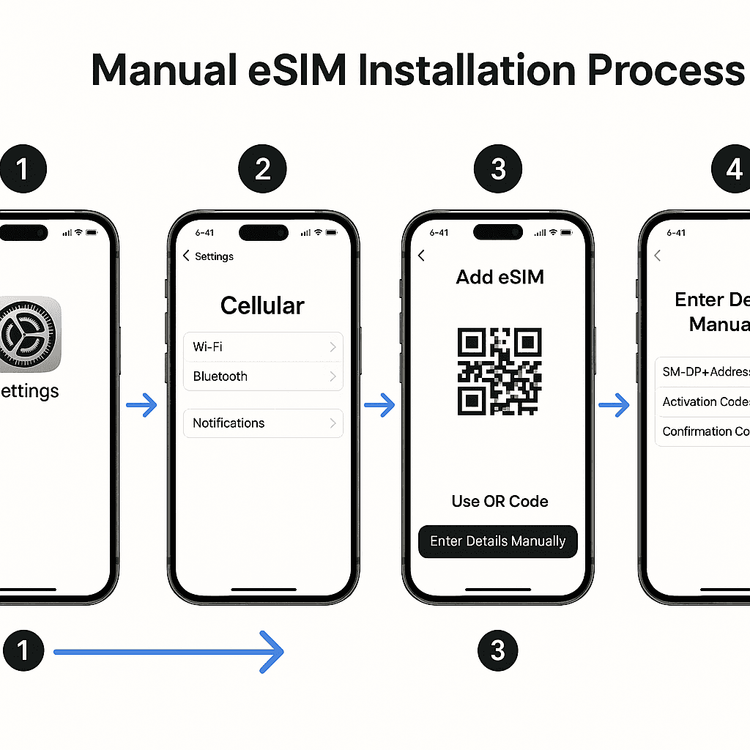
However, if you’re using another provider or need to do it manually for any reason, here’s how:
- Go to Settings > Cellular (or Mobile Data).
- Tap Add eSIM or Add Cellular Plan.
- On the “Scan QR Code” screen, look for and tap the option at the bottom: Enter Details Manually.
- Carefully copy and paste (or type) the SM-DP+ Address and Activation Code from your eSIM provider into the corresponding fields.
- Tap Next and follow the on-screen prompts to label your new plan (e.g., “Travel eSIM” or “Yoho Japan”) and choose how you want to use it alongside your primary line.
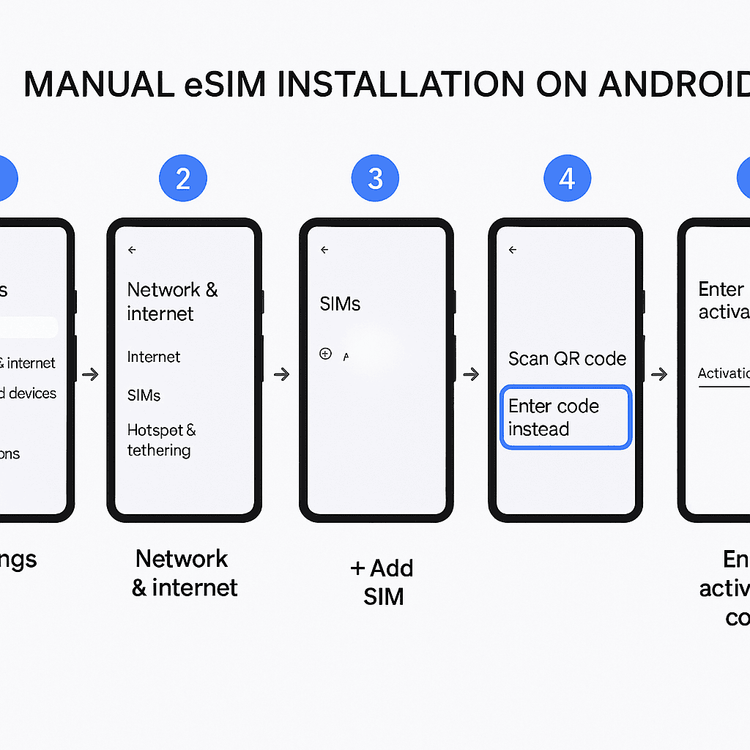
For Android Devices (Samsung, Google Pixel, etc.)
The path on Android can differ slightly depending on your device manufacturer and Android version, but the general steps are similar. According to Android’s official help pages, the process involves adding a new SIM profile through your network settings.
- Go to Settings > Network & internet > SIMs.
- Tap the + sign or Add eSIM (or similar wording).
- When the camera opens to scan a QR code, select the option Need help? or Enter code instead.
- You’ll be prompted to enter the activation code. Copy and paste the long string of characters from your provider (this often includes the SM-DP+ address within it, formatted like
1$smdp.io$A1B2C3D4E5F6G7H8). - Tap Continue or Activate and allow a few moments for your phone to download and install the eSIM profile.
Now your eSIM should be installed and ready to use! Planning that big trip to the United States? Get your USA eSIM plan from Yoho Mobile for an effortless setup, no matter which device you use.
Pro Tips for a Smooth eSIM Experience
Once your eSIM is installed, follow these final steps to ensure everything works perfectly:
- Label Your eSIM: Clearly name your travel eSIM in your settings to easily distinguish it from your primary SIM.
- Turn on Data Roaming: For your travel eSIM to connect to local networks, you must enable Data Roaming for that specific line in your phone’s cellular settings.
- Peace of Mind with Yoho Care: Travel can be unpredictable. That’s why we offer Yoho Care. Even if you use up all your high-speed data, Yoho Care provides a backup data connection to ensure you’re never left without essential services like maps or messaging.
Frequently Asked Questions (FAQ)
What do I do if my eSIM activation code is not working?
First, double-check that you have copied the SM-DP+ Address and Activation Code exactly, with no extra spaces. If it still fails, the code may have expired or there might be a typo in the details provided by the carrier. Contact your eSIM provider’s support team with your order details for assistance. For troubleshooting common issues, check our guide on what to do if your eSIM is not working.
Can I manually add an eSIM to any Android phone?
You can only manually add an eSIM to an Android phone that is both carrier-unlocked and supports eSIM technology. While most modern flagship phones from Google, Samsung, and others do, it’s not universal. Always confirm your device model is on the compatibility list before purchasing an eSIM.
Where do I find my SM-DP+ Address and Activation Code?
These details are provided by your eSIM carrier upon purchase. They are typically included in the same confirmation email that contains your QR code. Look for a section explicitly labeled “Manual Installation” or “Manual Details.”
What if I’ve entered the details manually and the eSIM still won’t activate?
If the manual entry fails, ensure your phone has a strong, stable Wi-Fi connection, as this is required to download the eSIM profile. Try restarting your phone and attempting the process again. If the issue persists, the problem might be with the profile itself, and you should contact customer support for your eSIM provider.
Conclusion: Stay Connected, No Matter What
A QR code that won’t scan is a small obstacle, not a dead end. By knowing how to manually install your eSIM, you have a foolproof method to get connected and start your journey without delay. This simple process puts you in control of your travel connectivity.
At Yoho Mobile, we’re dedicated to making every step of your journey easier. From our one-tap installation for iOS to the peace of mind offered by Yoho Care, we’ve designed our service for the modern traveler.
Ready for a worry-free connectivity experience on your next adventure? Get your first Yoho Mobile eSIM plan today and travel smarter.
MERE KURATEREDE REJSETIPS
Stuck with an eSIM Not Working? Here’s How to Fix It
Læs mereTutorialsHow to Fix an eSIM Stuck On Activating
Læs mereTroubleshootingeSIM Connected But No Internet? 3-Step Checklist to Fix It Fast
Læs mereTroubleshootingHow to Install and Activate Your Yoho eSIM on iPhone
Læs mereTroubleshootingHow to Install and Activate Your Yoho eSIM on Android
Læs mere